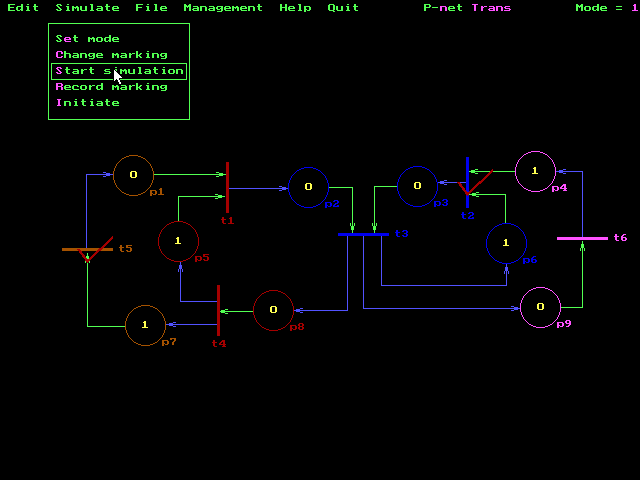
After creating a network it can be simulated as a Petri net (so far without time). Time is used in user models - see later. The following screen has been captured just before starting simulation with the network TRANS (a simple abstraction of a message transmission system distributed with all PetriSim models). There are several modes that differ in user control over the simulation. The mode is shown in the upper right corner (the mode 1 in the following screen means, that the user confirms every firing and selects the transition if there are more enabled ones). Note that two transitions are initially enabled: t2 and t5.

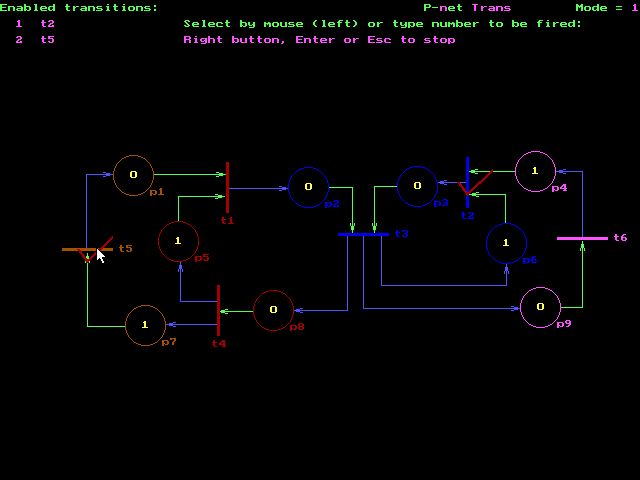
After clicking the left button in the above screen (or pressing Enter or "S") PetriSim starts the simulation. There are two enabled transitions so the user has to select one - see the following screen that has been captured just before selecting the transition t5 (the user is going to click it by the left button).

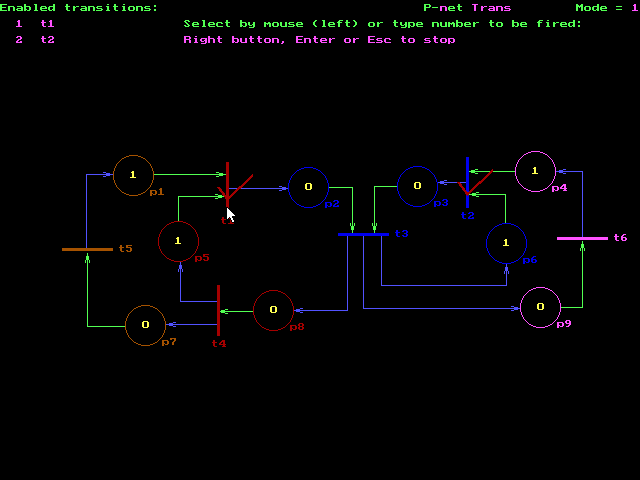
Firing the transition t5 models passing a message to the sender (the places and the transitions of this model are explained in the manual). The result of the firing is shown in the following screen. Now there are again two enabled transitions: t1 (transmitting a message) and t2 (receiver's activation). The user is going to select t1.

A simulation session similar to this one enables a detailed
studying of the network's behavior. There are fast simulation modes (with and
without delays) that can be used to search for deadlocks. In these modes a
transition to be fired is selected randomly by PetriSim (all with the same
probability). There is always one marking of the network recorded in RAM (either
explicitly by the user or by PetriSim when loading the network). So after a
deadlock the user can either change marking of some places manually or return to
the previous checkpoint.
After experimentation with the Petri network the
user can start creating a user simulation model based on this network.